
Hello Everyone Ashliegh Hepinstall (AKA Scraps Buttons N Bows) here to share with you a mini album made specifically for all of those vacation pictures you take with your cell phone. I chose to use the Echo Park Getaway paper for this project because this line is all about travel and it has all of the elements and fun colors I was looking for. This post will be fairly long so grab your favorite beverage and let's get started!


First a few things you are going to need:
- 1 Piece of black heavy weight paper accents chipboard.
- 1 6x6 paper pad of Echo Park Getaway
- 3 sheets of black 12x12 paper accents card stock
- 4 sheets of 8 1/2 by 11 black paper accents card stock
- 1 sheet of 8 1/2 by 11 white paper accents card stock
- 1 Echo Park Getaway chipboard accents sheet
- 1 Card stock sticker sheet. I only used a few of the stickers from the sheet however you have to buy the collection pack in order to get the stickers but have no fear I have another project planned using the 12x12 collection pack so I have included that link as well.
Just a note to complete this project you will also need adhesive and some basic tools such as a trimmer and or scissors as well as a score board and possibly a craft knife.
First start with your 12x12 piece of black chipboard. Out of this chipboard sheet you will need to cut (2) pieces measuring 5 inches wide and 5 inches tall (5x5) also 1 piece measuring 2 inches wide and 5 inches tall 2x5.

Next you will need to choose the front and back cover papers from your 6x6 paper pad. i like my front and back cover to be the same paper. I like to use a 1/2 inch score tape and on the back side of your paper choice, put your score tape around the edges of the paper. You will also need to put adhesive on one side of all of your chipboard pieces. As shown in the picture below.

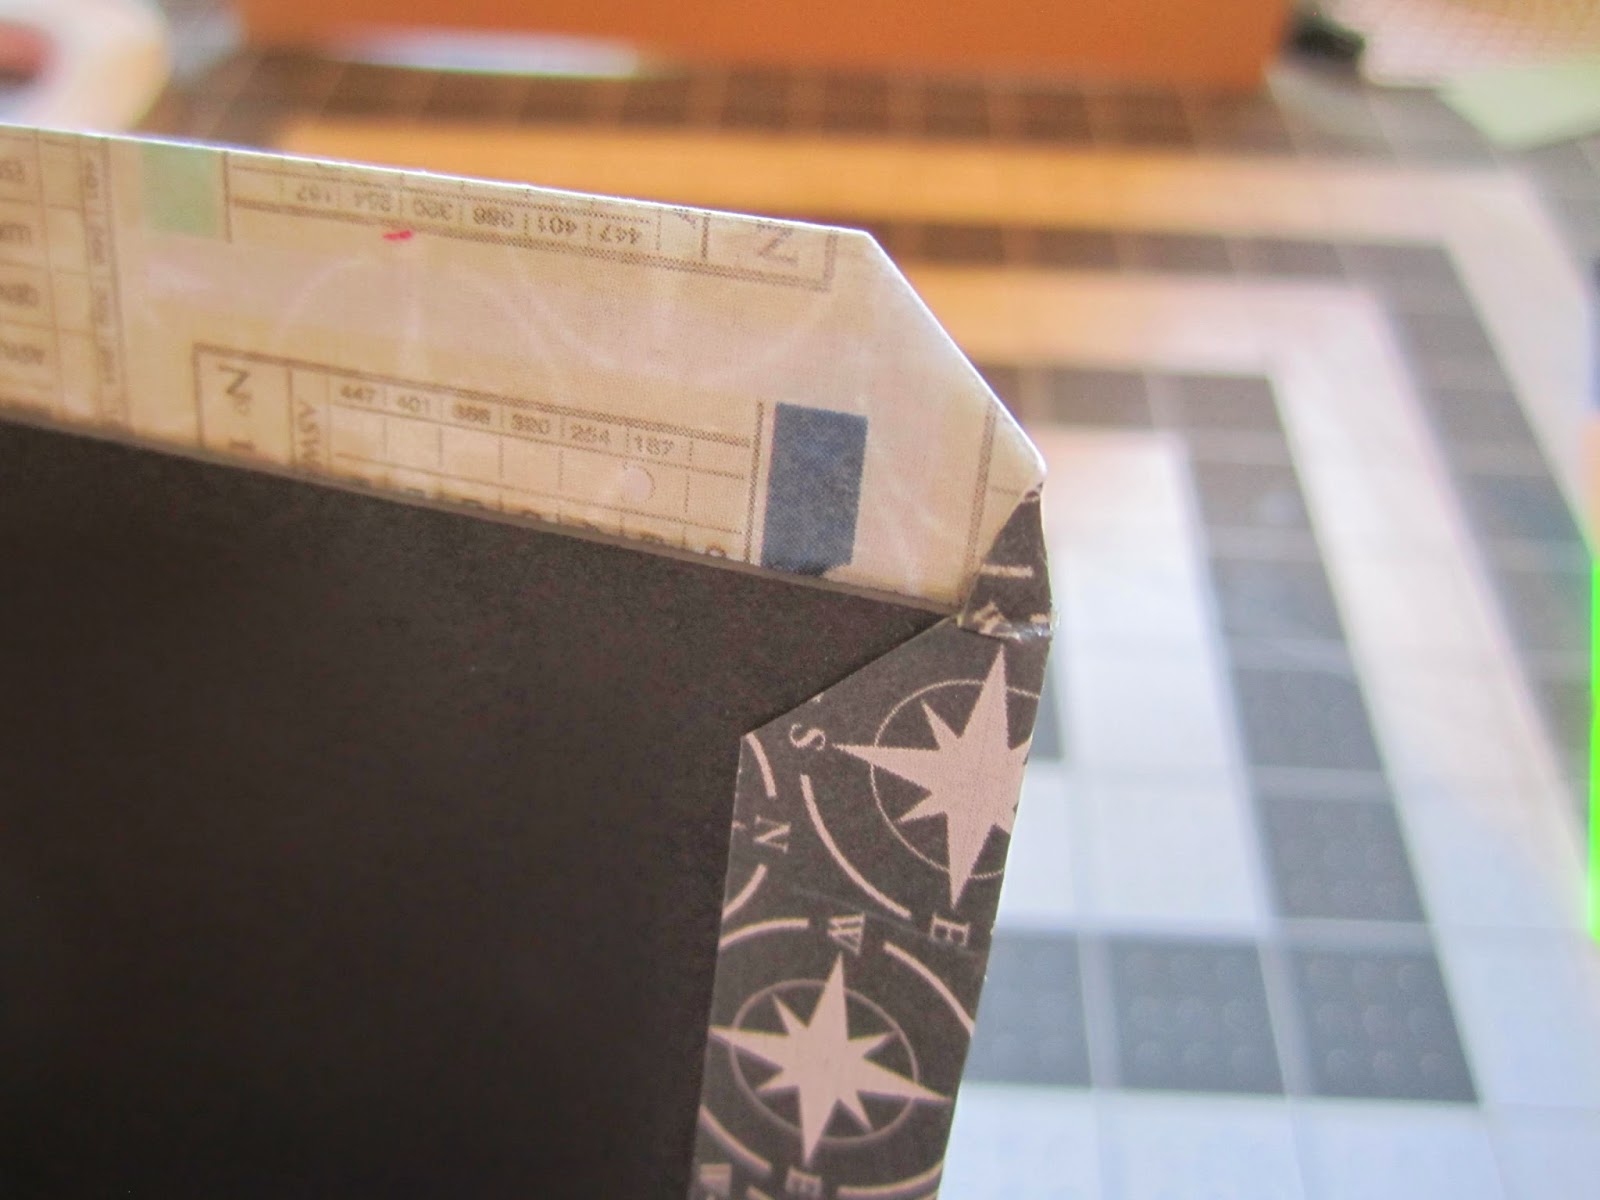
Next you will need to adhere your taped side of the chipboard down to the back side of your paper( the side with adhesive) . Now you will want to miter all 4 corners on both Pieces of covered chipboard. As shown in the pictures below. Just a little tip if you use the half inch score tape and do it exactly as i have shown you will not need to line anything up. The 5x5 chipboard piece will fit perfectly in the center of your card stock. Also it is important to miter your corners this will allow you to have beautiful corners and also it will be easy to fold.


Now what you will want to do is take the tape off of one side as shown in the picture below. Then take the tape off of the opposite side

Now fold the edges over and you will want to push the corners in ward so that the other flaps will cover nicely as shown on the picture below.

Now do the same thing to the 2 remaining sides. This is what it should look like.


Now do the same steps with the back cover chip board.
Now you will need to pick out the paper you would like to use on your spine and cut it to 5 wide 5 tall (5x5)
directly in the center of the side you do not want showing. Place your spine chip board piece (remove the tape) on your paper be sure and center it with 1 1/2 inches on either side of the chip board as shown in the picture below

Next add at least 1 inch of tape to the outside edges of your spine paper as shown below. As well as adding at least an 1/2 inch of tape to the front side of both front and back covers on the spine side edge. TIP remember to double check when working with directional papers.


Now remove all of the tape and adhere your covers to your spine as shown in the picture below. Leave about 1/16th of an inch to 1/8th of an inch between the spine edges and the cover edges. This will allow for a nice folding front cover and spine. I prefer 1/8th of an inch.


The next step will be to cover the inside front and back covers. For this i like to use matching card stock. The measurement for these sheets will be 4 7/8 of an inch wide by 4 7/8 of an inch tall. I apply score tape to the backside of the entire sheet. By doing that I can guarantee a strong hold with no bulging when we adhere the paper that covers the inside spine.


Now you will want to cut a piece of black card stock measuring 4 1/2 inches wide by 5 inches tall. This will cover your inside spine. As a decorative touch i used the EK Success border punch Fleur De Lis to give it an extra little something something. This step is completely optional. Now apply adhesive to one side of the black card stock as shown below and adhere down. Start by removing the tape in the middle section. Stick that down first to assure proper alignment then once this piece is adhered, remove the outer strips of tape and adhere down. Now you will need to gently fold your front then your back covers inward creasing the inside fold and pushing that card stock into the 1/8 inch gap we created earlier.


Now your book is built lets work on the hinge system then i will show you how to cut your 12x12 black card stock to optimize paper usage. First things first the hinge system.
First start by cutting a piece of black card stock at 6 1/4 wide by 4 3/4 tall. Grab your score board and place your paper at the top with the 6 1/4 width and score at the following measurements:
1/4, 5/8, 1, 1 1/4, 1 5/8, 2, 2 1/4, 2 5/8, 3, 3 1/4, 3 5/8, 4, 4 1/4, 4 5/8, 5, 5 1/4, 5 5/8, 6, 6 1/4.
This will give you 6 hinges with 1/4 inch gussets and 3/8 inch hinges.


Now i will show you a way to pre apply your tape making the adhesive process easy and quick. Start on the front side that is the side that faced you as you were scoring. apply tape to where the hinges would be as shown in the picture below

Now flip that paper over and apply tape as i have show in the picture below. this picture will show you where to put the tape so you can glue your hinges together. Start by putting tape on the first left most scored section and the very next one. Then skip 2 scored sections and put tape in the next section and repeat. Skip the next 2 and then place tape in the next one and so on until the last scored section far right edge and put tape in that section as well.


Now flip it back over and fold the folds between each of the side by side strips


Now flip it back over and remove the tape to adhere both sides of the hinge folds together.


Now put tape on the back of your hinges.

I do not have a picture for the next step but it is easy just remove the tape on the back of your hinges and apply to the inside spine of your mini album.
Next we will make the pages of our mini album
First you will want to cut 6 of the following 4 3/4 inches wide by 11 inches tall pieces of cardstock, choosing the color that matches your paper

Now get out your score board and place your 11 inch length across the top and score at 4 3/4 and
9 1/2


Now fold your paper like so

Apply liquid glue to the front side bottom and adhesive to the left and right side of the pocket flap

this is the pocket you will create

This is the mat that will fit inside the pocket we just created. The black mat measures 4 inches wide by 4 1/2 tall and the white mat is 3 7/8 inches wide and 4 1/8 tall

Now all you will need to do is attach your pages by removing the tape off of each hinge and sliding the left side over the hinge make sure the front pocket side is facing you as you do this.
The picture below is the mat that pulls out from the side. You will need to make 6 of these. 8 1/2 wide by 4 3/8 inches tall all 3 mats for this will measure 4 1/8 inches wide by 4 1/2 inches tall


For a video tour of this project click the link below to view the video
I hope you have enjoyed this project as I had fun making it. This is an awesome gift and super fast and easy happy crafting.

Just a cute little card I made from left over scraps!

Fantastic ashliegh, off to check my stash lol
ReplyDeleteGreat project Ashleigh.Thanks for the tutorial.
ReplyDeleteGreat job on this great mini...and the tutorial is wonderful. Thanks Ash!
ReplyDeleteTerrrrific Ash, got through my cuppa as well.
ReplyDeleteGreat tutorial, thanks for sharing and the cards are super cute.
ReplyDeleteLove the mini, tutorial was great...
ReplyDeleteLove this...going to try and make one...great tutorial ASHLEIGH !
ReplyDeleteBeautiful mini album, Ash!
ReplyDeleteThanks for the great tutorial!
ReplyDeleteSomeone's birthday is coming up this weekend ao I plan on going home and making this for them. Thanks for making very easy instructions.
ReplyDeleteThanks Ashleigh, great tutorial
ReplyDeleteupnurse at aol dot com
WOW THANKS, FOR THIS GREAT TUTORIAL
ReplyDeletegr.Akkina
Thanks Ash! You rock on tutorials!
ReplyDeleteAmazing!!! Thanks so much for the fantastic tutorial and the inspiation!!
ReplyDeleteThanks Ash...you ROCK!
ReplyDeleteThank you everyone such awesome kind words you all are awesome sauce big hugs ashliegh
ReplyDelete